
Some ARC Raiders quests are hard because of enemies. Others are hard because the game gives you just enough direction to get lost. ARC Raiders Lost in Transmission falls into that second group.
The objective sounds simple, but one missed prerequisite, wrong turn, or lost key can waste an entire Spaceport run.
You need the correct tower, the right access route, and the terminal at the top before the mission finally makes sense.
This guide walks through the requirements, Control Tower A6 location, key use, terminal step, possible problems, and reward so you can finish the quest without burning another raid.
What You Need for Lost in Transmission?
Before deploying, make sure the mission is active and your loadout is ready.
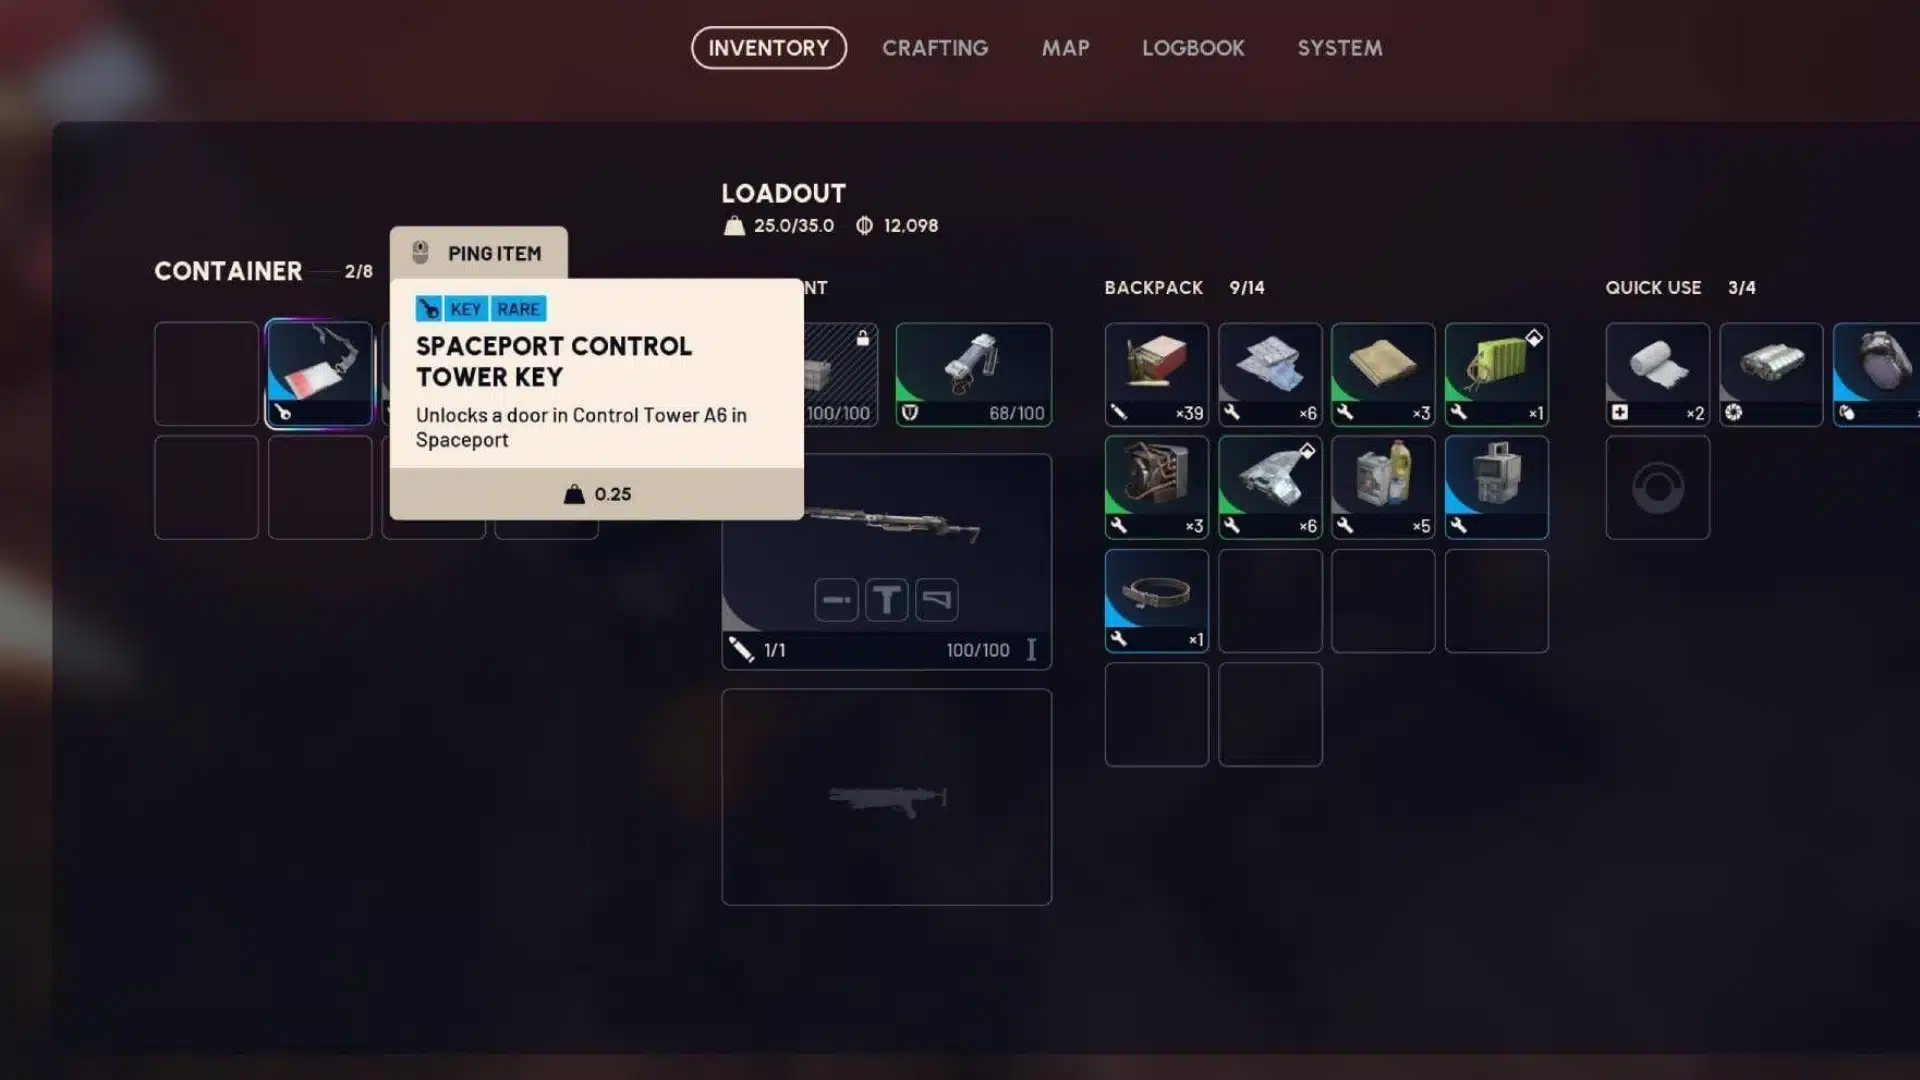
Lost in Transmission comes from Shani after completing Our Presence Up There, and accepting it grants you one Spaceport Control Tower Key. You need:
- Previous quest completed: Finish Our Presence Up There before Lost in Transmission becomes available.
- Lost in Transmission active: Accept the mission from Shani before entering Spaceport.
- Spaceport Control Tower Key: Shani gives you one when you accept the quest.
- Safe Pocket: Put the key here if your loadout has one. You keep Safe Pocket items if another Raider eliminates you.
- Spaceport selected: Every mission objective takes place on this map.
- One uninterrupted round: Visiting A6, reaching the top, and establishing the connection must happen during the same raid.
- Smoke grenades (optional): A6 draws PvP traffic, so carrying a couple gives you a way to break contact if a firefight starts before you reach the terminal.
The key deserves the most attention. Losing it before opening the tower can force another attempt unless somebody has already opened the required door.
How to Complete Lost in Transmission in ARC Raiders?
Completing Lost in Transmission comes down to three things done in one round: reach Control Tower A6 on Spaceport, ride the zipline to the top, and use the terminal in the control room to establish a connection.
Here’s the exact sequence:
- Deploy into Spaceport: Make sure Lost in Transmission is active, and the Control Tower Key is in your inventory.
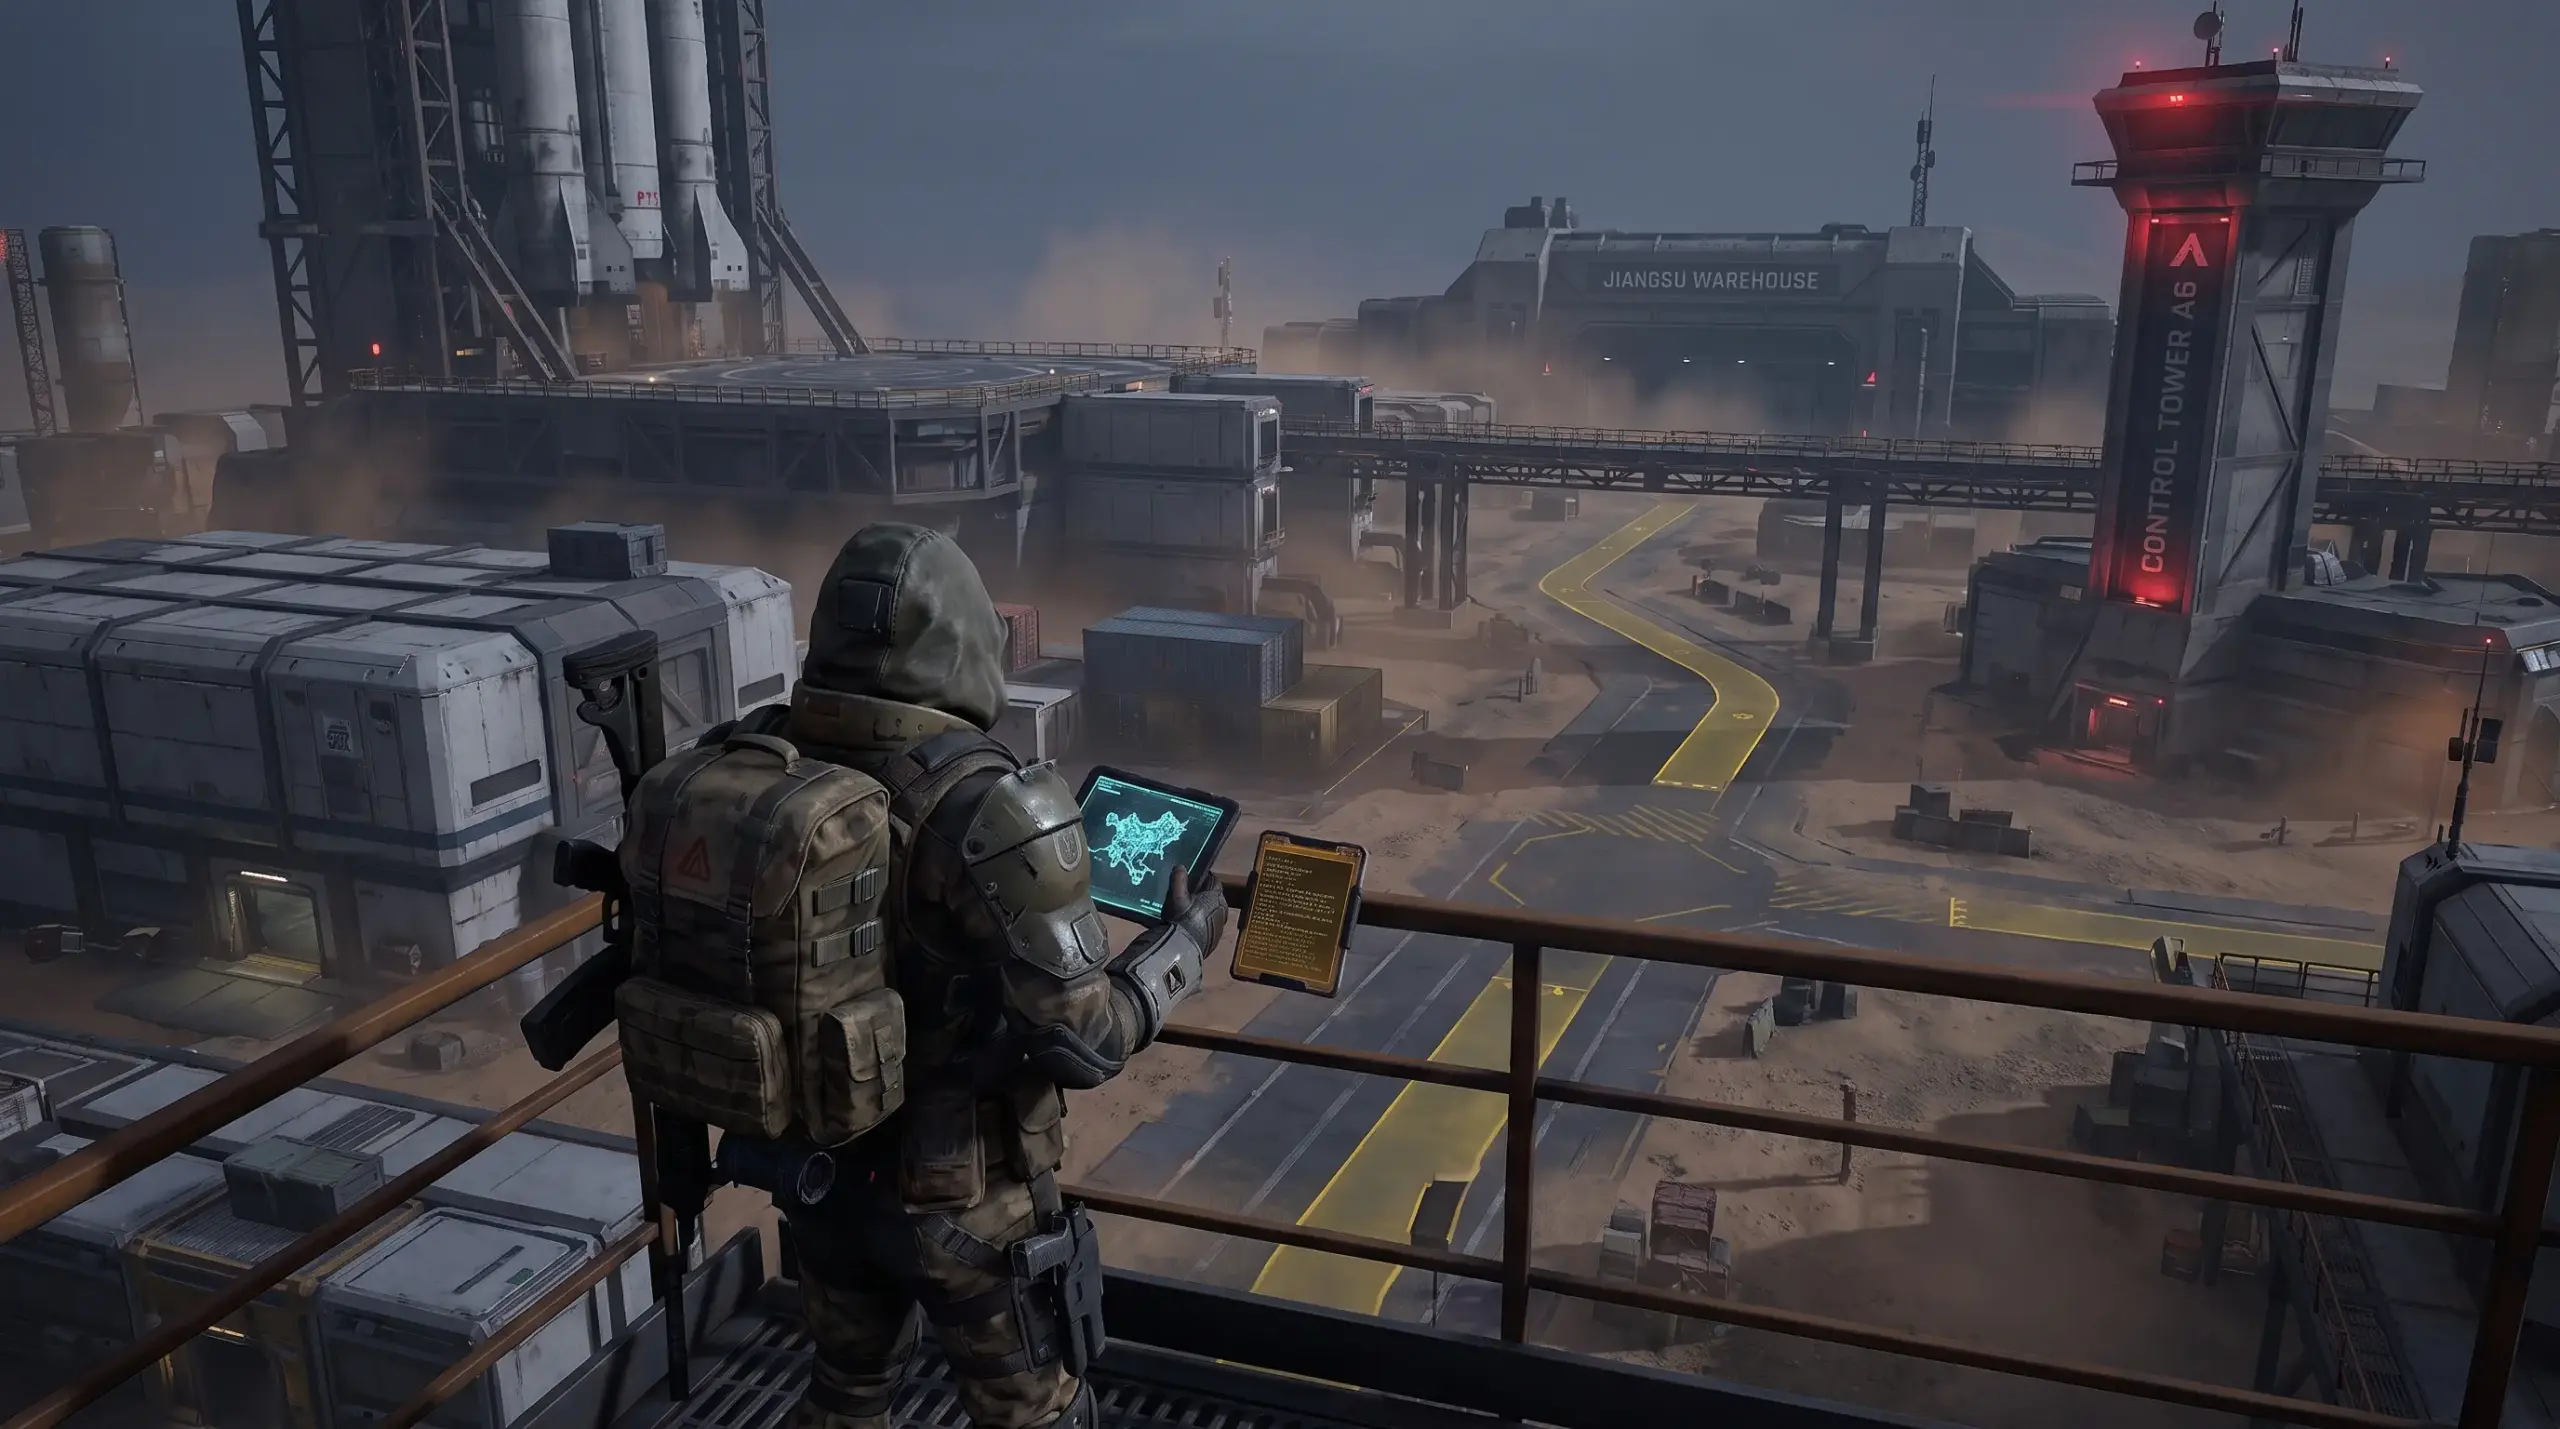
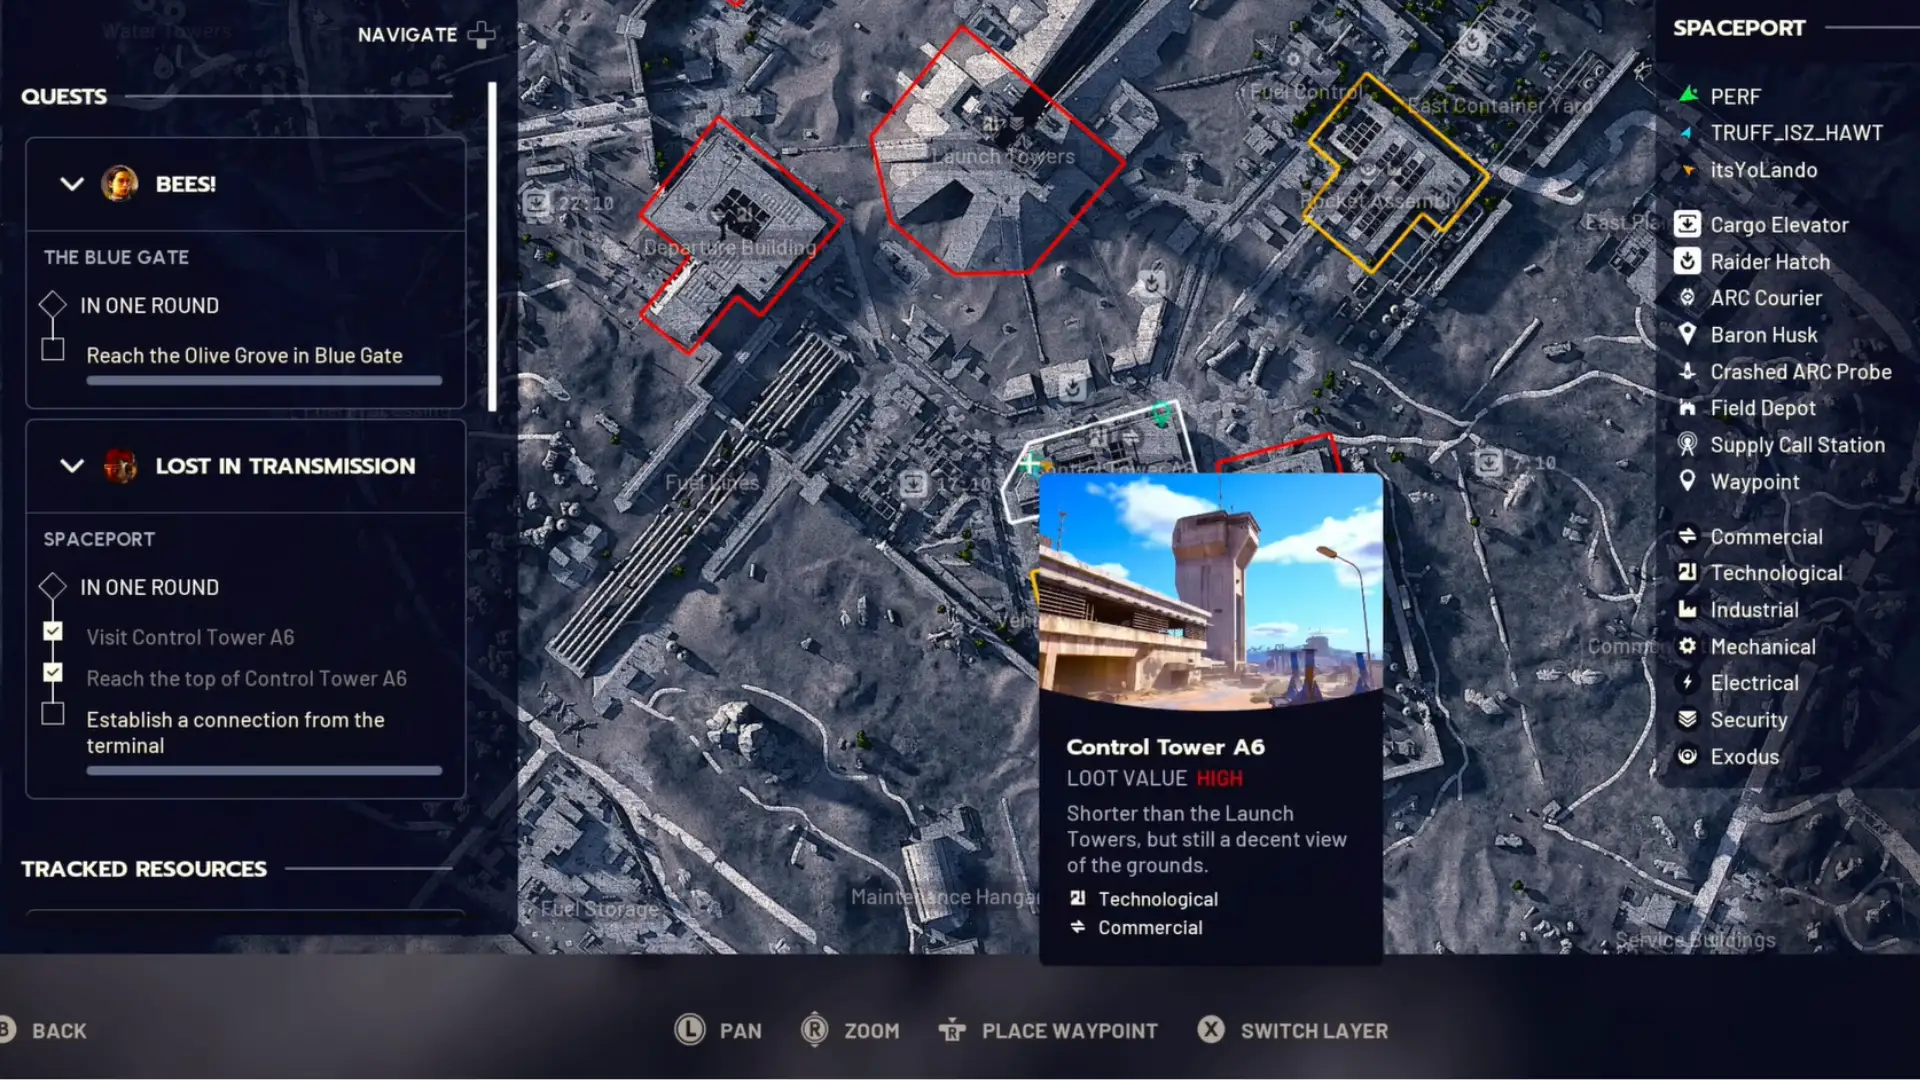
- Travel to Control Tower A6: Head toward the marked tower near the lower-central section of Spaceport.
- Enter the tower: Move through the ground-level entrance until you reach the locked access door.
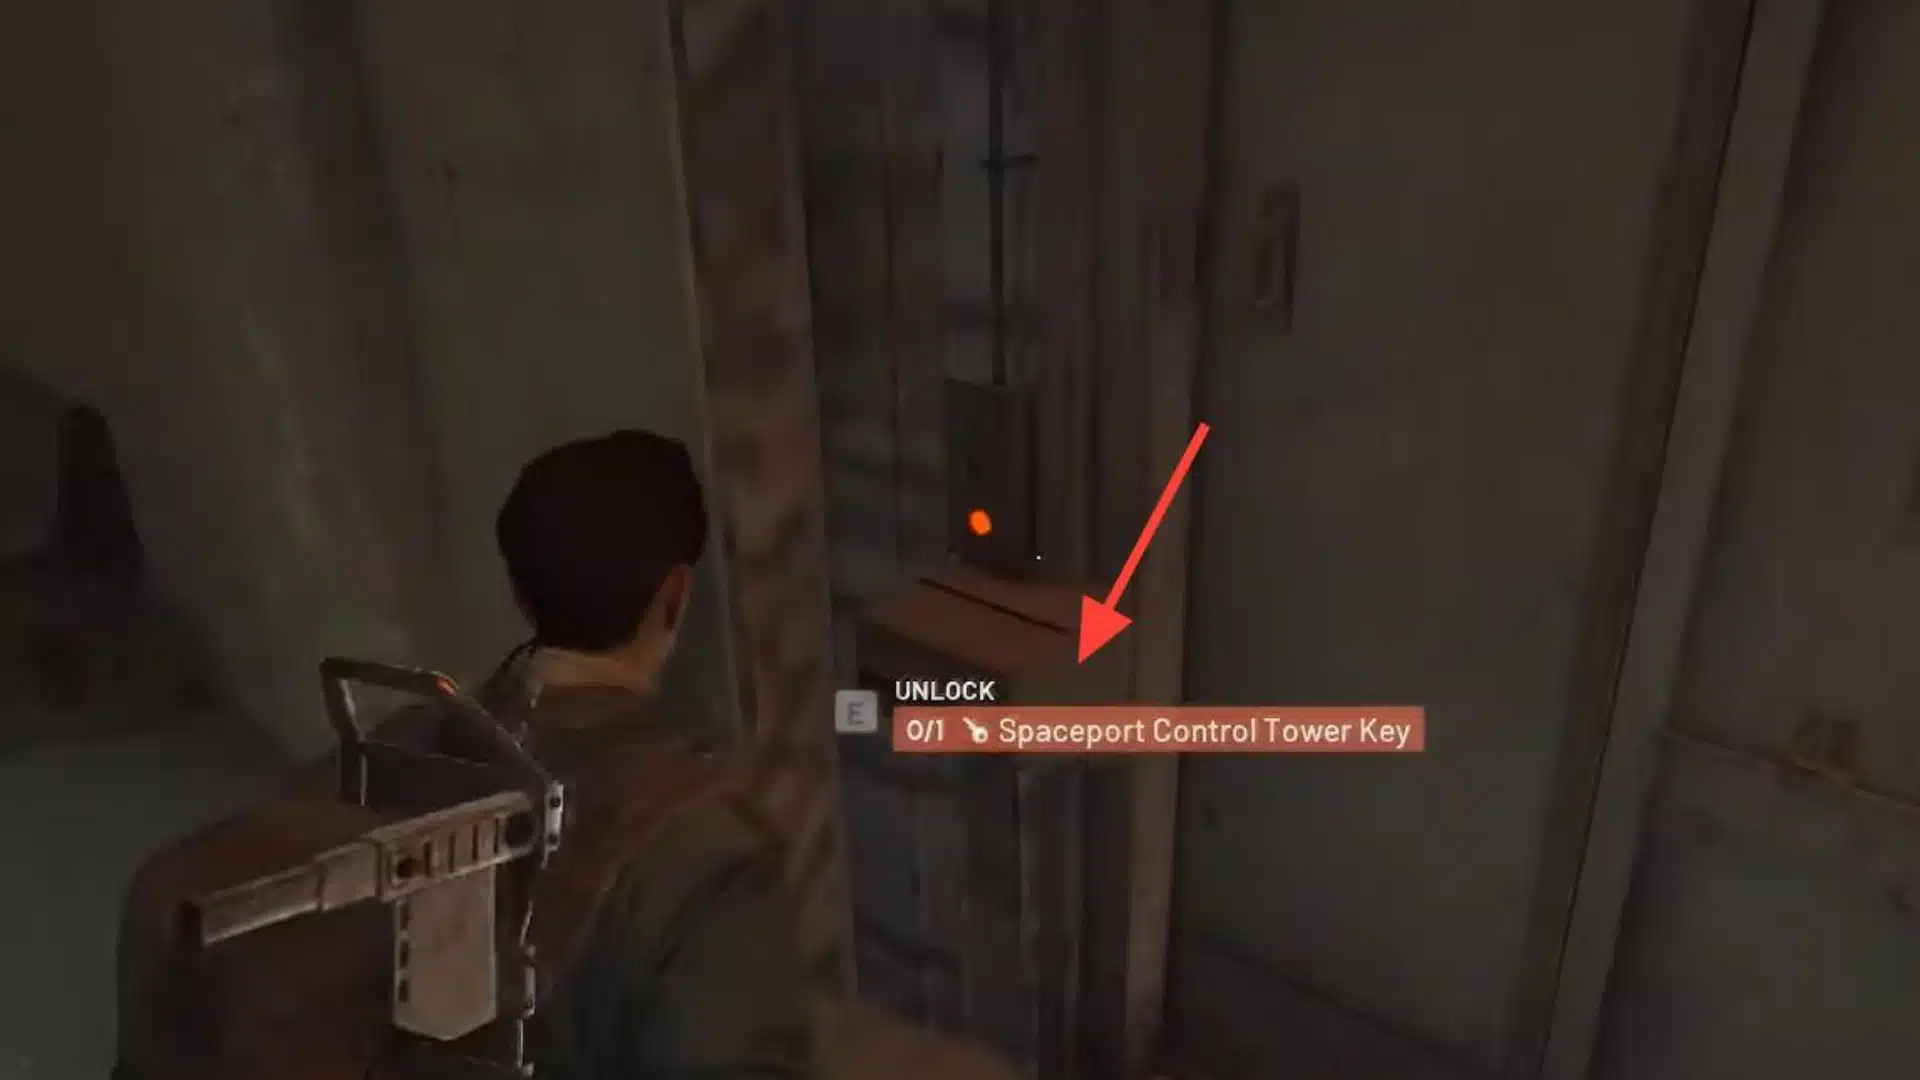
- Use the Spaceport Control Tower Key: Unlock the door leading into the tower shaft. If another Raider has already opened it, you can continue without spending your own key.
- Take the zipline upward: The unlocked section gives you access to the route toward the upper control room.
- Enter the control room: Once you reach the top, look for the required terminal. Guides place it to the left as you enter the room.
- Interact with the terminal: Hold the interaction until the connection completes. Once it registers, the mission objectives are finished.
You can then leave the area and return to Speranza to claim the quest reward.
If you like walkthroughs that favor exact steps over guesswork, our Final Fantasy II walkthrough takes the same approach across a much longer questline.
Where is Control Tower A6 on the Spaceport Map?
Control Tower A6 sits around the lower-central portion of Spaceport, west of Container Storage and southwest of Rocket Assembly.
The tower itself is tall enough to spot from a distance, but checking the map first is safer than trying to identify it while moving through the area. Set a marker on Control Tower A6 as soon as the round starts.
Your spawn position can change how practical the route is, so avoid crossing unnecessary high-traffic areas just to approach from one particular direction.
The tower is also a valuable loot location, which means other Raiders may already be heading there even when they are not completing this mission.
Other guides on this quest note the same pattern: the locked section tends to hold worthwhile loot, which is exactly why it stays contested.
What to Do If the Terminal Won’t Register?
If the terminal at the top of Control Tower A6 won’t register your key, back away from the console and re-approach it, or relog and re-enter the round before trying again.
This has come up alongside separate reports of an ‘infinite key’ bug affecting the same area, so if your key isn’t behaving as expected, you’re likely not doing anything wrong.
If this happens to you:
- Back away from the console and re-approach it before trying again.
- Try relogging and re-entering the round rather than repeating the interaction in place.
- Don’t assume you’ve got the wrong key- check current bug reports before spending another key or making another trip, since this kind of issue tends to shift between patches.
Situations You Can Run Into at Control Tower A6
A short objective does not necessarily mean a clean run. Control Tower A6 can play out differently depending on when you arrive and what happened earlier in the raid.
- The locked door is already open: Another Raider used a key before you arrived. You can use the opened route and continue toward the terminal without unlocking it yourself.
- You lost the quest key: Shani’s idle dialogue says another key may be found around the offices at Spaceport. Keys also turn up as loot in residential areas like Ruby Residence and Pale Apartments, and in the Research and Administration Building, though finding one in the same run is never guaranteed.
- Other Raiders are inside: Control Tower A6 attracts players because of its loot and elevated position. Approaching immediately or waiting until activity dies down can both work better than arriving during peak traffic.
- Someone is camping the upper route: The zipline and tower access create predictable movement paths. Check the area before committing to the climb.
- You reach A6 but fail before using the terminal: The objectives are grouped under “In One Round,” so incomplete progress does not carry the mission to another raid.
Lost in Transmission Reward
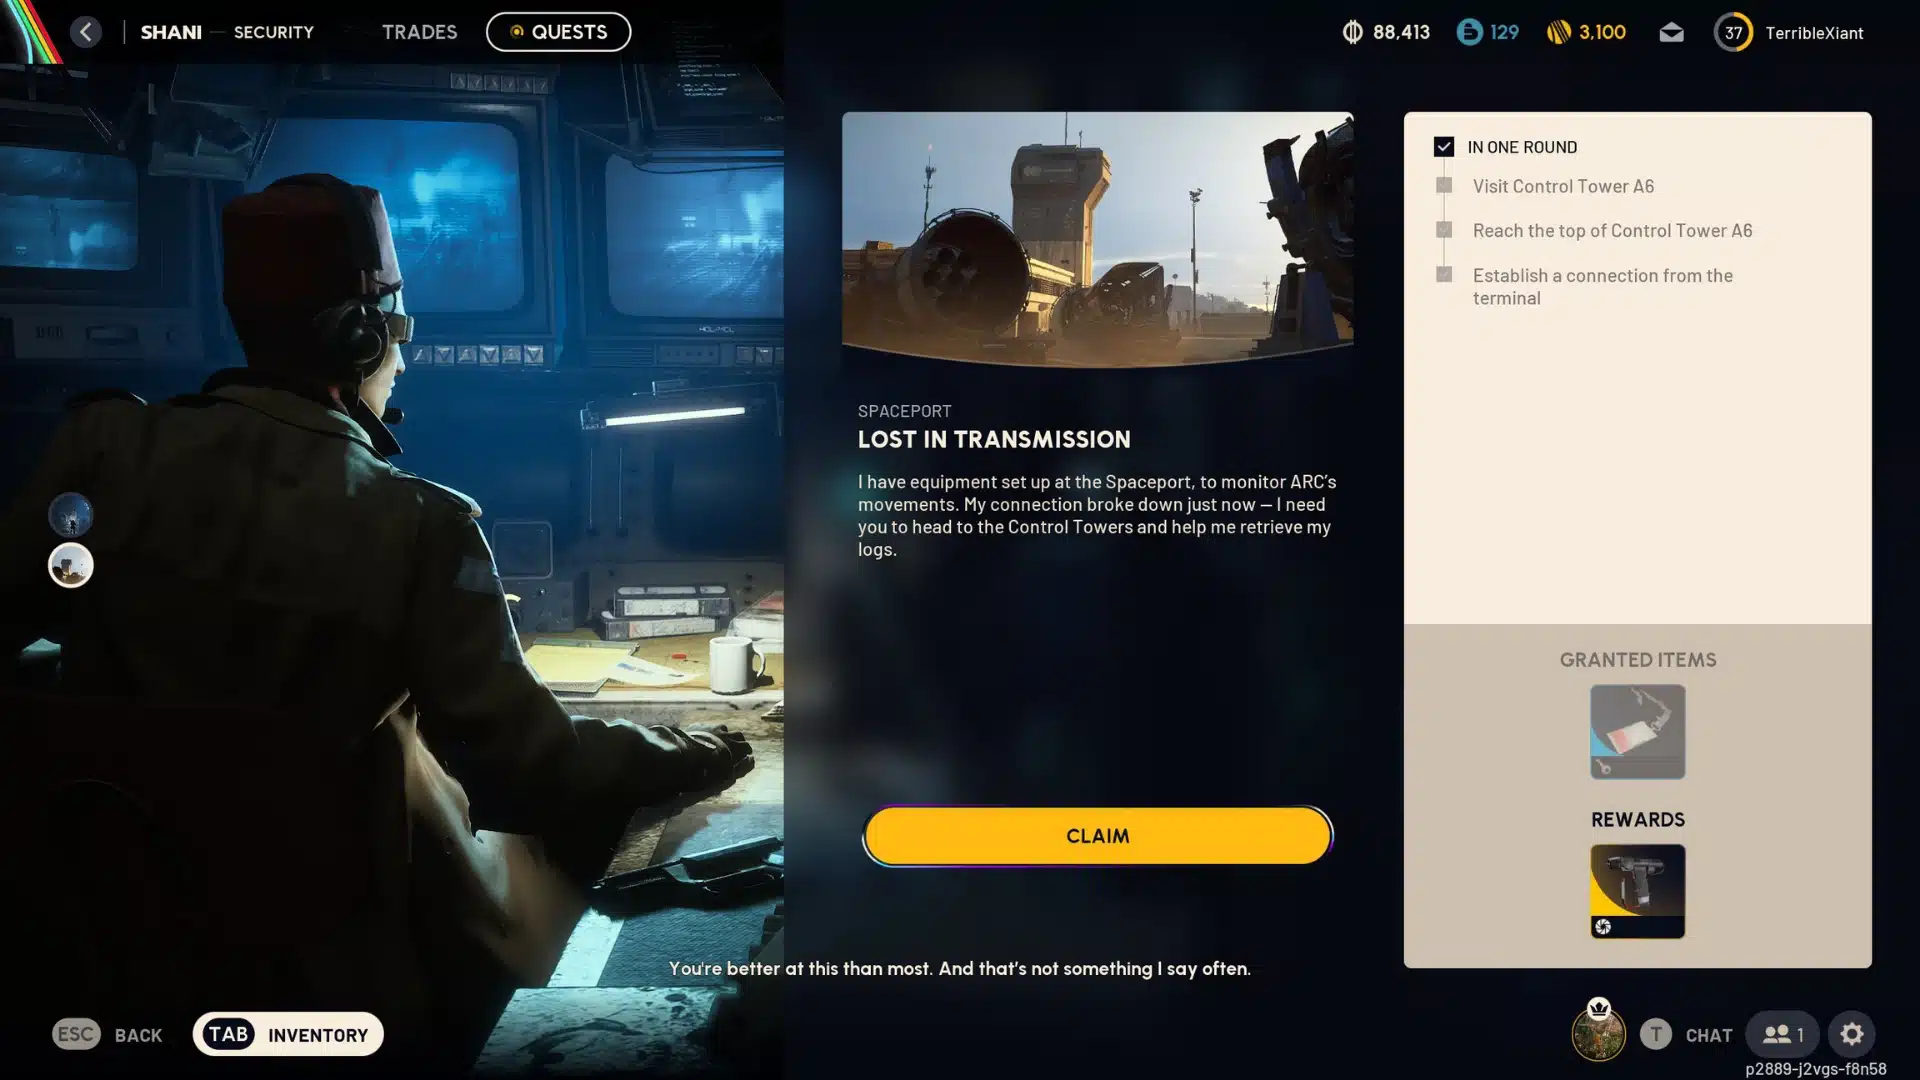
Completing Lost in Transmission rewards you with one Snap Hook, a Quick Use traversal item designed for reaching elevated positions.
The reward fits the mission because reaching the top of Control Tower A6 already introduces you to vertical movement.
Once you have the Snap Hook, you gain another option for getting onto rooftops, platforms, and other elevated structures during later raids.
It’s one of the few traversal items worth keeping in your loadout well past the quest that unlocks it, since a way onto a rooftop can save a rotation that would otherwise dead-end.
After claiming it from Shani, Lost in Transmission is complete, and Communication Hideout becomes the next quest in this part of her chain.
What Else Should You Do While Completing Lost in Transmission?
Do not turn the quest into a full looting run if Control Tower A6 is busy. Still, a few useful things are worth doing when the area is quiet.
- Loot the control room: The locked tower area can contain valuable supplies, so check nearby containers after completing the terminal interaction if the area is secure.
- Learn the A6 route: Control Tower A6 is an important Spaceport landmark. Remembering its entrances, vertical routes, and surrounding buildings can shorten later runs.
- Get familiar with vertical movement: The quest reward is the Snap Hook, so Lost in Transmission effectively introduces the type of elevated traversal that becomes useful elsewhere.
- Prepare for Shani’s next quest: Completing Lost in Transmission leads into Communication Hideout, which moves the quest chain to the Red Tower in Old Town on Buried City. That mission requires finding a battery cell, repairing a generator, and booting an antenna terminal in one round.
Conclusion
ARC Raiders Lost in Transmission becomes much easier once you know the real path: accept the quest from Shani, bring the Spaceport Control Tower Key, reach Control Tower A6, take the route upward, and use the terminal in the control room.
The tricky part is not the objective itself. It is keeping the key safe, reaching the right tower, and finishing everything in one round.
If the door is already open or another route becomes available, you can still complete the mission. Once the connection registers, return for the Snap Hook reward.
Did you find another safe route through A6? Share it in the comments.
Frequently Asked Questions
What Quest Comes Before Lost in Transmission in ARC Raiders?
Lost in Transmission becomes available after you finish ‘Our Presence up There.’ Shani won’t offer it before that. If it’s missing from your log, check that quest first- once completed, it points you straight to Spaceport’s Control Tower A6.
Can I Complete Lost in Transmission without the Key?
Yes. A spare key found elsewhere on Spaceport, or a door another Raider has already unlocked, can both get you to the top of Control Tower A6 without your original key. It’s a solid fallback if you’re missing the usual access item.
Why Won’t the Terminal Register Even Though I Have the Key?
Some players hit a bug where the terminal doesn’t recognize a valid key, sometimes tied to broader ‘infinite key’ reports around this area. Try re-approaching the console or relogging before assuming your key is wrong; this issue can vary between patches.
What Do You Get for Completing Lost in Transmission?
Finishing the quest rewards the Snap Hook, a Quick Use traversal item that makes reaching rooftops and other elevated positions much easier. You receive it automatically once the terminal interaction registers, and it stays in your loadout to use on later raids.